Search
Setting up the Online Systems
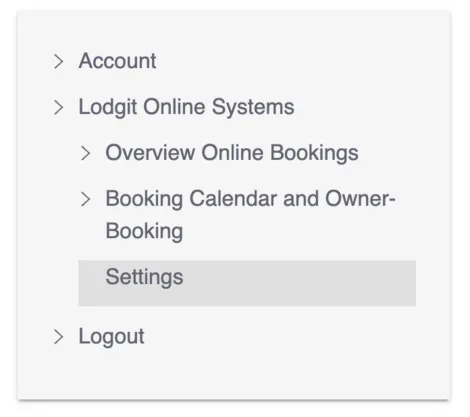
You can change your individual settings under Lodgit.com > Online Booking System > Settings.
After the first synchronisation with Lodgit Desk, you will be notified of any missing minimum information.
Required Data
- General Terms missing: You have not yet added any general terms for this rental object. General terms and conditions are terms and conditions that must be accepted by a guest when making an online booking before completing the ordering process.
- Object Description missing: You have not yet added a description for this object that a guest will see as a quick overview of the object when doing an online reservation. This description will be show on the first page of the online booking module.
- Payment Methods missing: For this rental object, it has not yet been determined which payment methods are available to a guest when booking online. You must specify at least one payment method per rental object.
- Contact Information for online bookings missing: For this rental property, you have not yet stored any contact details that will be sent to a guest after an online booking has been made. This address as well as contact information such as telephone and e-mail address will be displayed to the guest on the confirmation page and in the confirmation e-mail.
- Cancellation conditions are missing: You have not yet entered any cancellation conditions for this rental object. These will be displayed to the guest on the confirmation page and in the confirmation e-mail after the online booking has been made.
Important: Without the above listed data, the online booking system and the online booking calendar cannot be activated for the public. Please make sure you have entered all the required information.
Setting up the System: Options
Aside from the required information there are several other options for the Online Systems. With these you can adapt the online booking system and the online booking calendar to your personal website design and preferences.
Please note that most of the settings can be made globally for each property, but some settings can also be made individually for each rental unit (e.g. the Image Gallery).
Important: Because you can create an Online Booking System and Online Calendar for each property and rentable unit, you can (and must) make these settings individually for each of these generated systems and calendars!
In the following, we will explain the configuration process using our German booking page ‘Hirschblick guesthouse’ as an example:

Selecting An Object or Rentable Unit
First go to Settings in your Lodgit account and select an object or rental unit under “Configure rental object” (here: object: Hrischblick guesthouse). In the drop-down menu “Display” you will find all configuration areas for the online booking system. Here you will also find the minimum information that you had to enter first (general terms and conditions, cancellation conditions, etc.). You can change, shorten or add to these later as you wish.
Texts that you enter here are usually displayed on the start page of the online booking system. You can also make some settings individually for each rental unit.
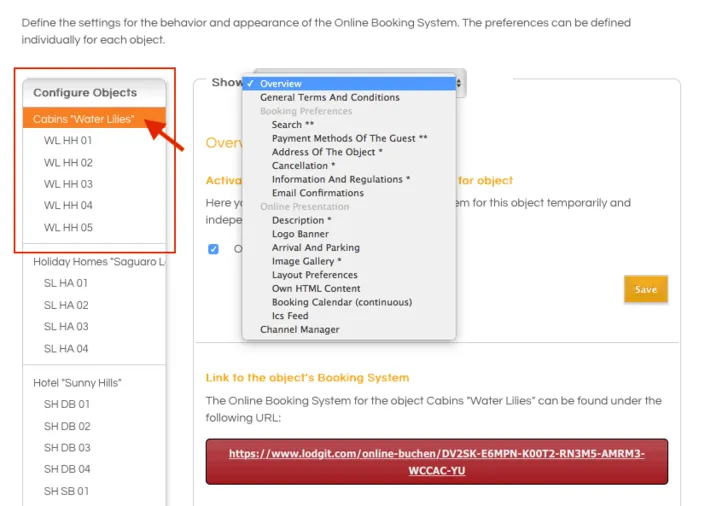
Overview
In the Overview area, you will find the link for the online booking system and the basic settings imported from the Lodgit Desk installation: the synchronised languages, time zone, minimum booking duration and specified arrival and departure days as well as their cancellation deadlines and the property’s equipment features.
In addition, you can activate and deactivate the online booking system here.
Important: Please make sure that you have checked the activation box if you want to use the Online Booking System for this object!
If you scroll down this page you will also find:
- Link to the booking system of the rental object
- Link to the quick enquiry of the rental object
- Code example for embedding the quick query in an iframe fro your website
- Settings taken from Lodgit Desk for your object (restrictions in arrival and departure, synchronised languages etc.)
General Terms and Conditions
This is where you can edit and publish your General Terms and Conditions. The GTC are part of the required information you had to add at the very beginning.
Important: Before publishing, create the texts in all languages you want to offer! By clicking on the “Publish” button, the currently valid terms and conditions automatically become invalid.
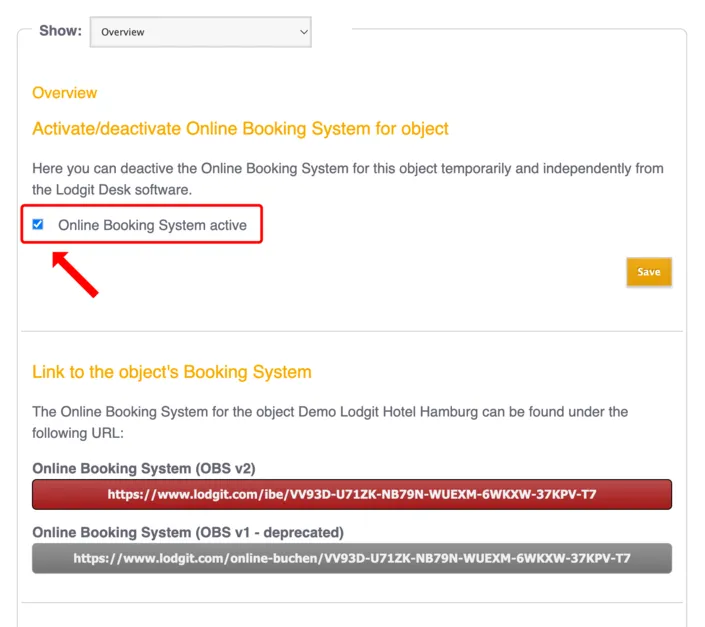
Booking Preferences: Search
The Search area lets you define how you want the rentable units to be sorted when the search results are displayed, whether the name of the rentable unit will be listed and what should happen if there are no vacancies in the chosen time frame.
Separately means that each unit is listed in the search results individually, which is best if your units all have individual pricing and features. Categories mode means that units you have defined to be in the same category in Lodgit Desk will be grouped together, which is best if you have a lot of units of the same type/price/features (e.g. 20 single rooms).
Show name of the rental unit: The name of the rental unit can be displayed in different places in the online booking system. Tick the places where you want to display the name. If you do not want to display the name at all, simply remove all the ticks.
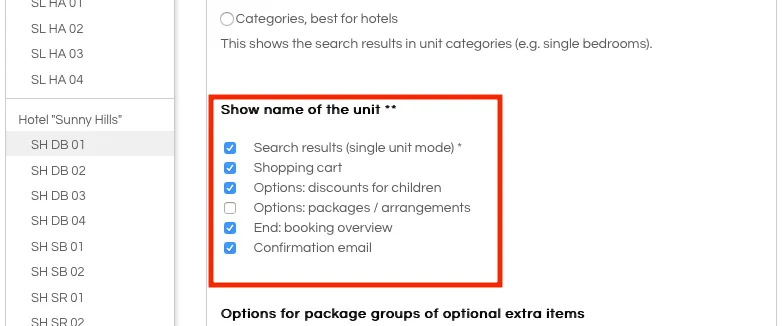
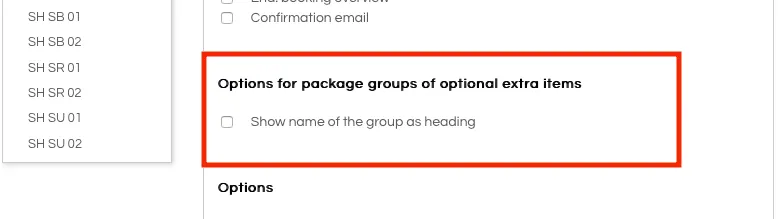
Options for package groups of optional extra items: If you make additional services bookable online and sort them into one or more selection groups, you can decide here whether the name of the selection group should be displayed as a title above the corresponding additional services.
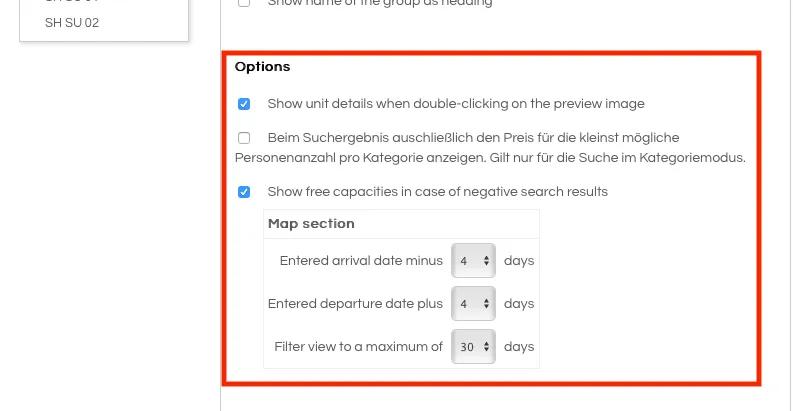
Options: When the rental units are displayed in the search results, the guest can view the details by clicking on the image to the left of the result (which you can enter in the settings for the rentable units). If you do not want this, remove the tick from this option. If there are no units available in a search period, you can show the guest an occupancy calendar so that he or she can possibly choose another period for his or her visit. You can define the display criteria for this calendar via the selection menus.
Booking Preferences: Payment Methods of the Guest
The payment methods are part of the minimum information for the online systems. Select at least one of the payment methods offered here: Single debit from the guest’s account, credit card, credit card via Paypal PLUS and via Unzer (formerly Heidelpay), transfer to your account, Paypal or payment on site.
Important: Lodgit does not receive any payments from your guests. As the operator, you are responsible for collecting payments yourself. Therefore, only choose payment methods that you can use!
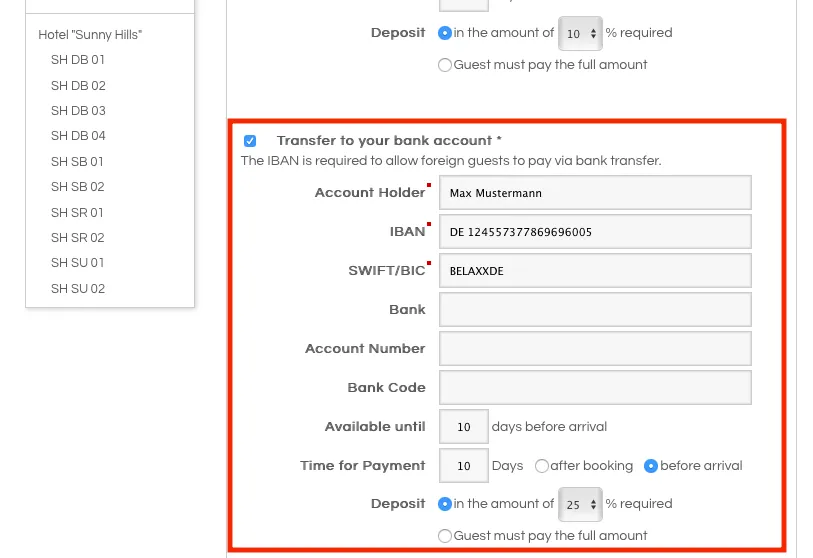
Under Available until you can determine how many days before arrival the customer can still complete their booking with this payment method. The standard payment target period specifies the payment target for the down payment. You can set the payment term depending on the day of booking or the day of arrival.
Time for payment: means the term during which you want to receive the deposit payment as a confirmation for the booking. You can set this as a time period of x days in reference to either the day of the booking or the day of arrival.
Deposit: For your own security, a deposit of at least 5% of the booking price is required for almost all payment methods. The only exception is the payment method payment on site.
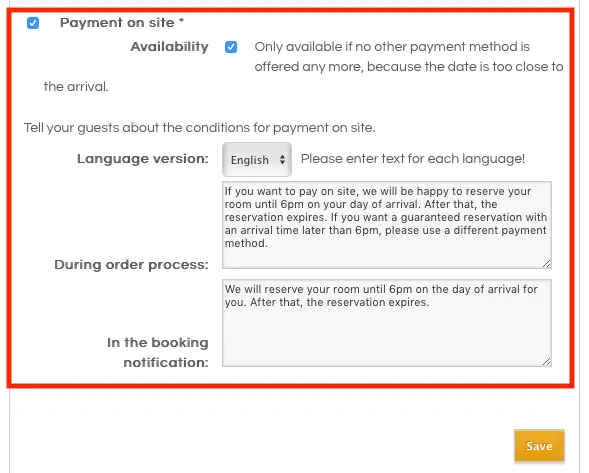
Payment on site: With payment on site, there are no options for a deposit or the relevant payment term. By ticking the box Only enable if no other payment method is available, you can enable this payment method only for short-term bookings for which no other payment is possible because the date is too close to the arrival:
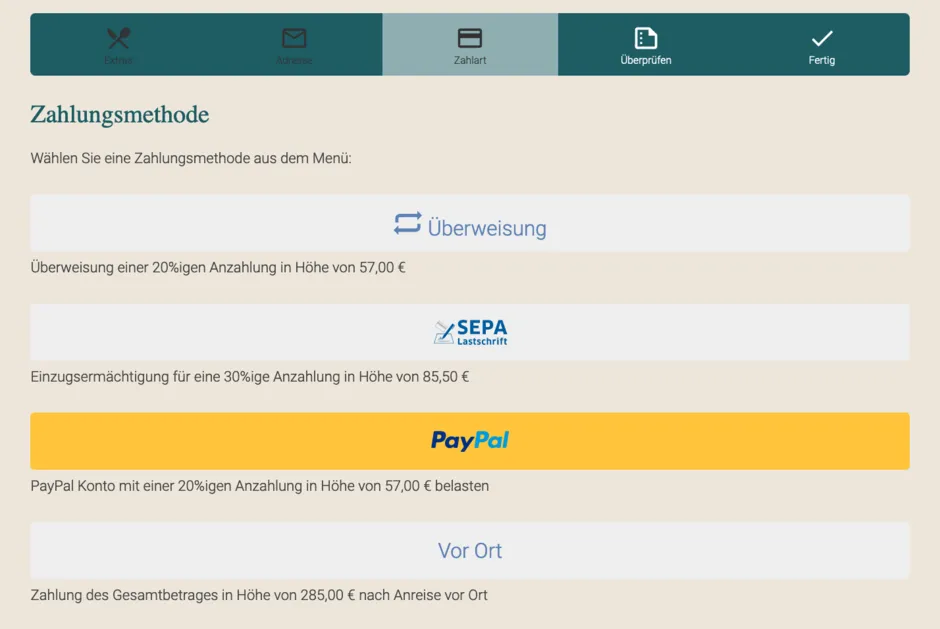
In our example, guests can pay in this way (here the option for credit card payment via Unzer or Paypal PLUS has not been activated), German language image below:
Booking Preferences: Contact Information
Here you can enter and edit your contact information. This information will be displayed to the guest in the provisional booking confirmation.
Booking Preferences: Cancellation Deadline
This is where you can define the deadline for a free cancellation. This will be displayed in the confirmation email with the exact date and time. If the deadline has already passed (because the arrival date is too close to the booking date), no information about a free cancellation is listed.
Booking Preferences: Cancellation Policy
The cancellation policy is part of the required information you had to add at the beginning. This is where you can, at any time, further edit the text. The cancellation policy will be shown to the guest on the last page before the booking is completed as well as on the front page under “Legal Information”.
Important: Before you publish your texts, make sure you have added the texts in all languages. Once you hit the button “Publish”, all currently valid cancellation policies will automatically become invalid and be overwritten.
Booking Preferences: Information and Regulations
Any additional information you add here will be shown to the guest in the provisional booking confirmation email they receive. You can use this to answer frequent questions and concerns (“What to do when there’s nobody at the front desk?”) or leave a note about future correspondence (“You will receive a binding confirmation within 24h after we have received the deposit payment.”).
Booking Preferences: Email Confirmations
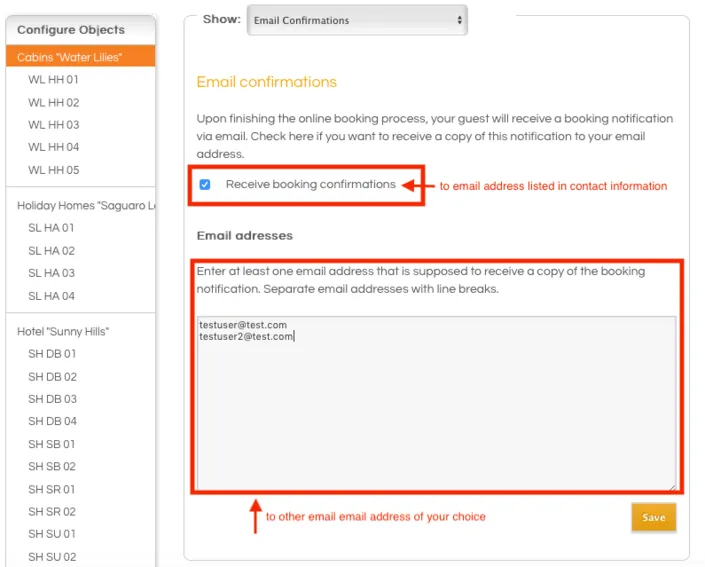
To be notified about new incoming bookings you can have a copy of the confirmation email sent to your email account.
If you would like to receive such a copy, tick the box Receive booking confirmations. A copy will then be sent automatically to the email address you have stored in the contact information. If you want to send this copy to additional email addresses, enter these addresses in the field below. Separate email addresses with a line break.
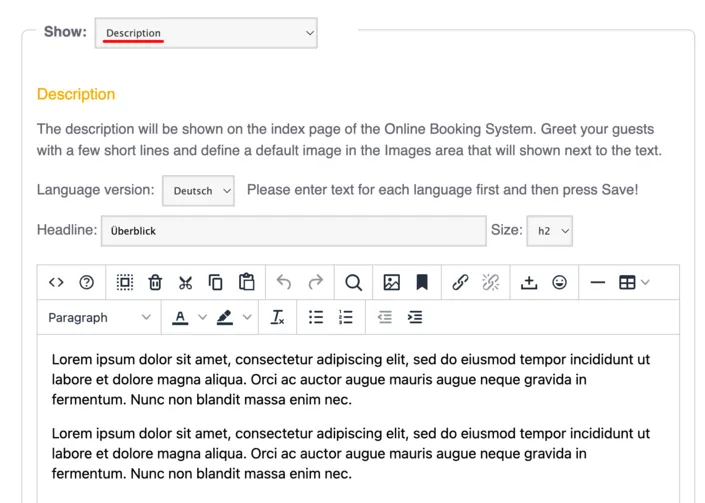
Online Presentation: Object Description
Here you can enter the property description that appears on the start page of the online booking system. For the description of individual rental units, please select the rental unit from the left menu and then select “Description”.
Important: Before publishing, create the texts in all languages you want to offer! By clicking on the “Save” button, the currently valid object description is automatically overwritten.
Online Presentation: Logo Banner
In this section you can upload a banner to be displayed instead of the standard header: The banner should have a size of 1280px x 168 px. Please note: The banner will be displayed in all language variants of your system and cannot be adapted for individual languages.
If you do not want a banner for your online booking system, you can select the design without banner in the layout preferences.
Online Presentation: Google Maps
To make it easy for your guests to find you, you can add a map section of your location in the online booking system. There is also the option of a route planner. This is displayed on the homepage under the heading “Arrival”.
Online Presentation: Arrival and Parking
Other arrival information, e.g. times for check-in or also check-out, rail connections, directions and the like can be entered here. This information appears on the homepage under the heading “Arrival” (above the map).
Online Presentation: Image Gallery
In the picture gallery you can upload up to 20 pictures to give your guests a comprehensive impression of your accommodation. The image gallery will be displayed on the front page under “Images”.
You can set one image to be the default image and it will be displayed on the front page next to the object description. Each individual image must not exceed 976 KB in size.
In addition to this picture gallery of the property, you can also add an individual gallery for each rentable unit which will be displayed when the guest clicks on the unit’s icon in the search results.
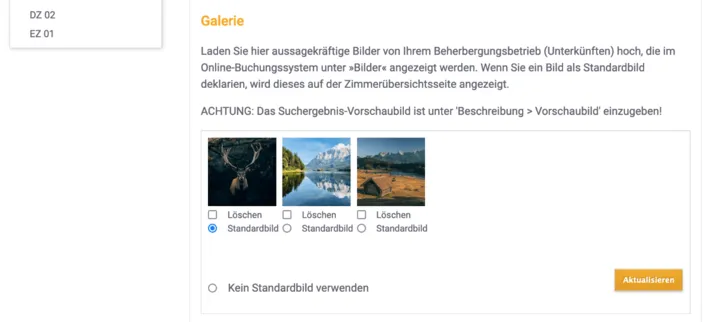
This is how the gallery will look on the website:

Online Presentation: Layout Preferences
In the Layout Preferences you can adjust the look of the Online Booking System and the Quick Search individually with CSS to make it fit seamlessly into your website.
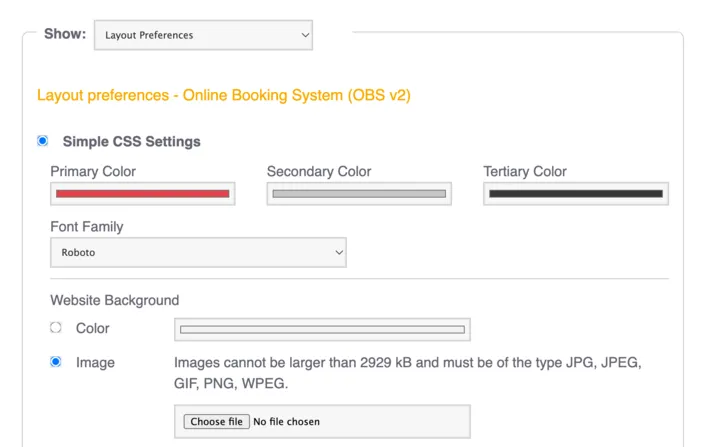
Simple CSS Settings
Here you have the possibility to easily and quickly change various design aspects according to your wishes. For this purpose you will find a set of simple tools that allow you to customise three colours, font, background, header and search form. When choosing the three colours, you could use the same RGB specifications or hex code to match your corporate colours.
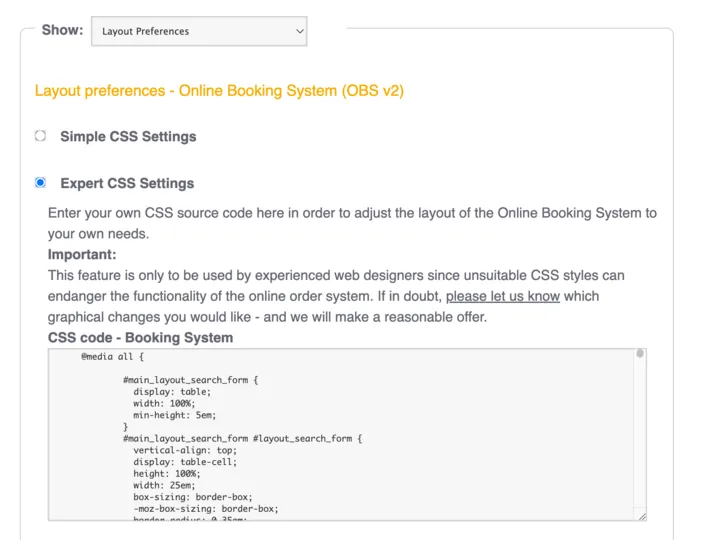
Expert CSS Settings
Important: Please note that only an experienced web designer should change the CSS settings because unsuitable CSS styles can compromise the functionality of the Online Booking System! Should you not have a web designer on hand, feel free to contact us and we‘ll make you an affordable offer for the adjustments you need.
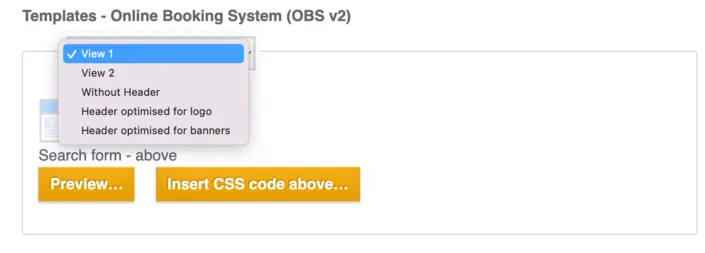
Select here which design template you want to customise. You can choose if you want a header for a logo/banner, if the search box should be in the top center or on the left side and if the header should be optimised for a logo (rather short) or for a banner (rather wide).
When changing the CSS styles, note that all values are commented out by default to avoid unwanted changes. To activate the individual tags, please delete the characters /* before and */ after the respective line.
Online Presentation: Own HTML Content
Important: Before you publish your texts, make sure you have added the texts in all languages. Once you hit the button “Publish”, the current HTML content text(s) will automatically become invalid and be overwritten.
In the online booking system, you can still insert additional texts so that, for example, links back to the website or important seasonal information catch your customers’ eye better.
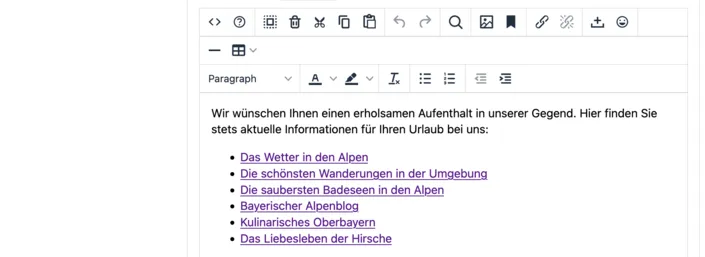
This self-created content is displayed under the heading “Additional information”. On our example page, this then looks like this:

Online Presentation: Booking Calendar (continuous)
The continuous Booking Calendar displays the vacancies in an object (with all its rentable units) with a time line:

Vacancies are green, occupancies are red and everything in the past is grey. You can link to the continuous Booking Calendar or integrate it into your website in an iFrame with the code snippet provided.
For individual units you can also generate a monthly calendar view to integrate in your website.
Important: Please make sure that the activation box is checked if you want to use the continuous Booking Calendar!
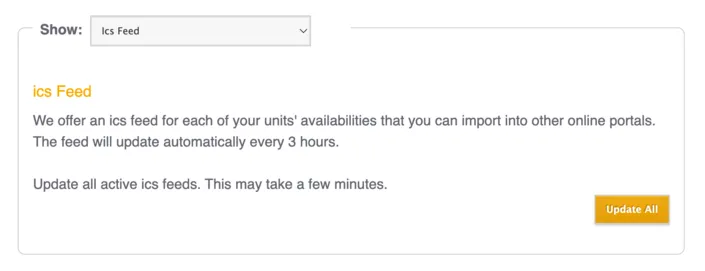
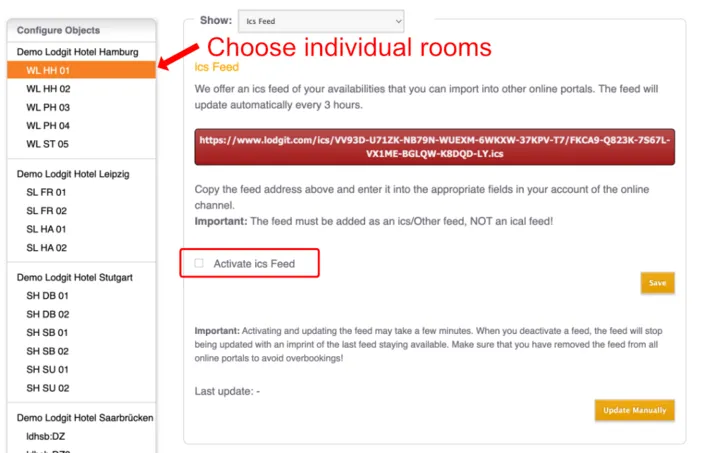
ics Feed
Here you can find the ics feed of the rental unit, activate and deactivate it, and update it manually. The feed is updated automatically at certain intervals. Feeds must be activated individually for each unit.
If you want to include the feed in another channel, e.g. airBnB or 9flats, you have to include it as an ics or other feed. The ics feed (Ical feed for Mac) sends the changes to the channel. The feed must be retrieved from the channel at regular intervals. This only happens if it is also integrated as an ics feed.
Note: At traumferienwohnungen.de a modifier has to be activated to interpret the ics feed correctly. Please point this out to your customer advisor for traumferienwohnungen.de!
Individual Settings for Single Rental Units
There are some options that you can define individually for each rentable unit. General information or options that concern the entire object, such as payment methods, route planer, or terms and conditions, can be defined in the Global and Object Options.
Overview
This is where you can find a link for this unit’s booking tool and check which feature settings were imported from Lodgit Desk.
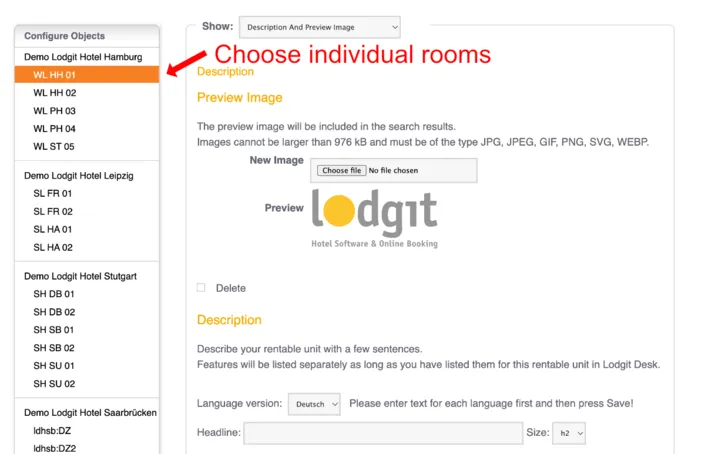
Description
Here you can define a description and a preview picture for each individual rental unit. The preview image is displayed next to the rental unit in the search results:
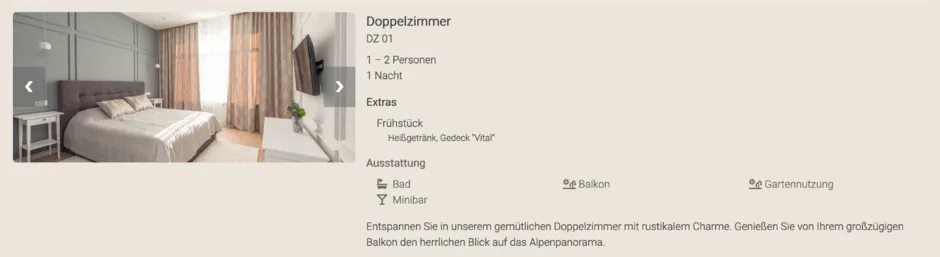
With uploaded photos and a short description, it looks like this in our example:
Limit Child Discounts
Some units may have discounts for children with a certain percentage of the full price (e.g. children up to 13 years pay only 50%). Here, you can decide how many full paying guests have to stay in the unit to allow those discounts to be attributed to other guests.
Image Gallery
Here you can upload pictures of the rental unit and set a default picture. The standard picture is displayed next to the description when you click on the preview picture. The guest can see the other uploaded pictures (up to 10) in the “Images” tab.
Integrate A Booking Calendar Into Your Website
For individual rental units, you can also display the free periods in the form of a calendar on your website:

Vacancies are green, occupancies are red and everything in the past is grey. You can link to the monthly Booking Calendar or integrate it into the website in an iFrame with the code snippet provided.
Important: Please make sure that the activation box is checked if you want to use the monthly Booking Calendar!
ics Feed
This is where you find the address of the feed, activate and deactivate it. You can also manually update it here, although it’s not necessary: The feed will update itself automatically in regular intervals. When connecting the feed with another channel such as airBnB or 9flats, make sure to connect it as a ics or Other feed. This is NOT an ical feed that pushes changes to the channel. Rather, the channel has to call the data from the feed, which only happens if it is also included as an ics feed.
Other Settings In Lodgit Desk
Booking Restrictions
The Lodgit Online Booking System allows you to set a minimum length of stay (MinLOS) as well as specific arrival and departure days.
Minimum Length of Stay (MinLOS)
In order to set a MinLOS for Lodgit online bookings, open Lodgit Desk and go to Administration > Synchronisation and Online Modules and then click the lodgit-Button in upper line:
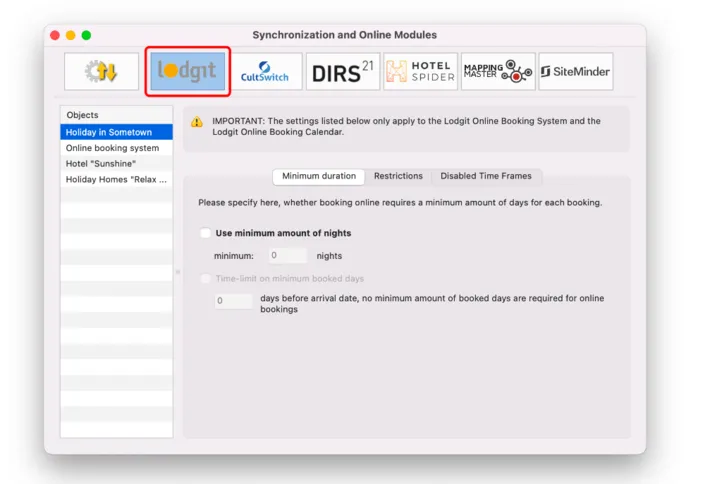
You can set a minimum number of days for each booking. If you want short notice bookings to not have to abide by those rules, you can set a time-limit for that restriction.
In the example above, the minimum length of stay is seven days. If the guest books 15 or less days before the arrival, however, then the restriction of MinLOS no longer applies.
Set Arrival and Departure Days
In order to set a specific arrival and departure weekdays for Lodgit online bookings, open Lodgit Desk and go to Administration > Synchronisation and Online Modules and then click the lodgit-Button in upper line:
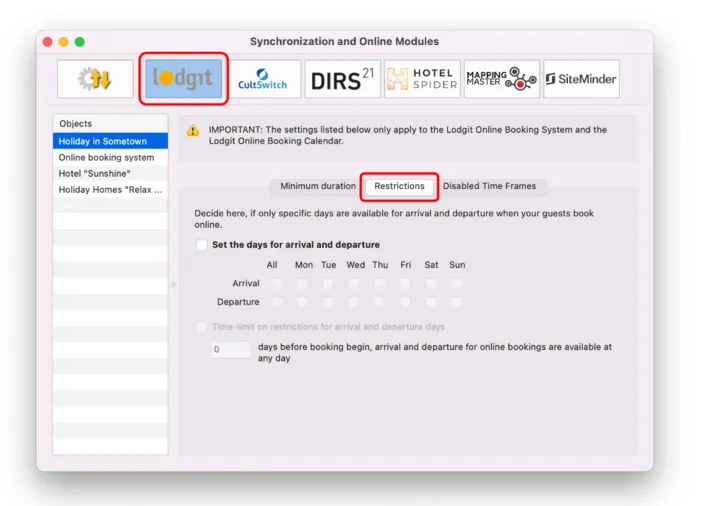
Allowing only specific weekdays for arrival and departure of guests can also simulate a MinLOS of sorts. Select the dates you want to allow arrivals and departures. If you want short notice bookings to not have to abide by those rules, you can set a time-limit for that restriction.
In the example above, guests can only arrive on Saturdays and leave on Fridays. This doesn’t change for guests, even if they’re ‘last minute’ bookers.
Stop Sell / Disabled Time Frames
As a general rule, all units that have bookings in them will count as ‘occupied’ online. Exceptions are bookings with the status ‘Checked Out’ and ‘Cancelled Online Booking’ as well as the statuses you exempted from being shown as occupied. But you can also block single units, an entire unit category or your entire object from being booked online in a certain time frame, e.g. because it’s the low season and you’d rather take bookings over the phone or via email.
In order to set up a stop sell (disabled time frames) for units, open Lodgit Desk and go to Administration > Synchronisation and Online Modules, then click the lodgit-Button in upper line and then switch to the tab Disabled Time Frames:
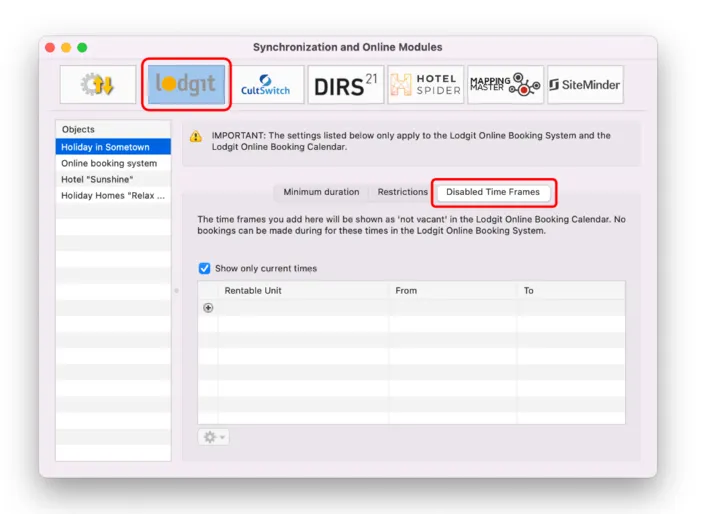
Use the plus button to add a new entry. In the column Rentable Unit you can select the unit(s) you want to block online. In the columns From and To enter the dates for the stop sell. You can block either All rentable units (1), one specific unit (2) or all units of a certain category type (3).
If you select an entry you can quickly duplicate it via the right-click or Actions menu in the lower left corner to make subsequent entries easier.
Synchronised extra items
With the Lodgit Online Booking System, you can make as many of your extra items available online so that guests may book them directly when they book their stay with you.
First, you have to go to Administration > Extras and Packages and then switch to the tab Packages. Here you’ll have to create a package for each extra item and/or each combination of extra items that you want to offer online:
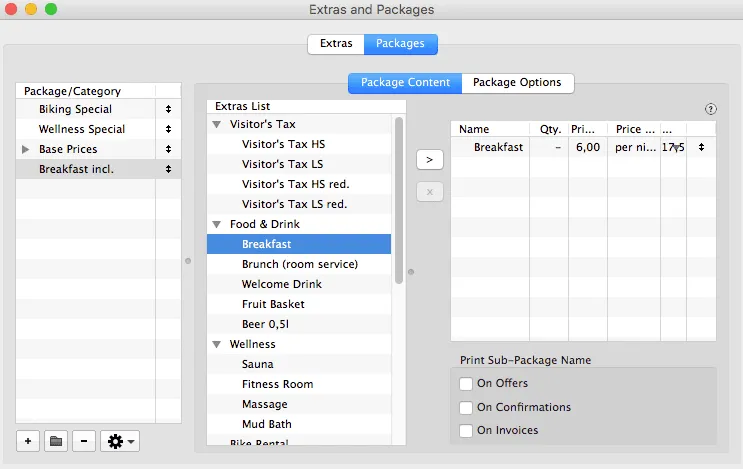
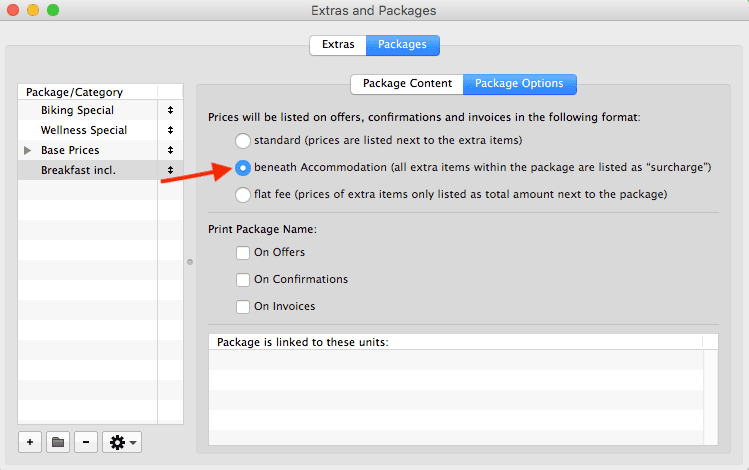
In this example, we’ve added the extra item ‘Breakfast’ to the package “Breakfast incl.”. In the tab Package Options you can now make sure that the package is inclusive:
Tip: If you have a package that contains more than one extra item, it’s best to select “Print Package Name on Offers”. This way, the package’s name will also be displayed in the Online Booking System.
Now go over to Administration > Objects and Rentable Units > Rentable Units. Open the rentable unit that you want to add the package to by double-clicking on it and then go to the area Extras / Packages:

Go to the tab Bookable Online to decide which packages you want to offer online. Check the box in the column Bookable to activate them.
If the package has the attribute “inclusive”, it will always be added automatically to the booking (see 1). Otherwise you have the option to decide whether it is automatically added or an option for the guest (see 2).
You can also sort packages into a Group. The packages within such a group cannot be added to the same booking. This can be used to offer different food options (breakfast only, half-board or full-board) or transfer options from and to the guest’s destinations (from/to the airport, from/to the train station or from/to the port). Put these packages into a group via the menu in the far right column and the guest can choose between them or select none.
The extra items can be booked by the guest after they’ve entered the ages of the guests (if applicable due to child discounts):

Automatically added inclusive extra items are listed at the very top without their price (see 1). Optional packages are listed below that and can be selected by checking the respective box (see 2). And below that you’ll find the packages that belong to a group; if you offer more than one group, each group has a small border drawn around it so guests know which they can choose from. The title of the group can be displayed as a heading for each box.