Search
Create invoice
After the status of a booking has been changed to Booked, Checked In or Checked Out, you can create an invoice for it.
Go to “Create invoice” window
There are three different ways to create an invoice:
… from booking window
Open the booking window for the booking in question. Press the button Create invoice.
… from reservation schedule
Select the booking in question in the reservation schedule and call up the context menu (right-click). Select the context menu item Create invoice.
… via menu bar
Select the booking in question in the reservation schedule and then go to Bookings > Create invoice.
Invoice window and settings
This will open the invoice window, which lets you create invoices for outstanding invoice items. This invoice can then be printed.

1. Select the invoice recipient. You can select one out of all the guests that have been added to the booking (that are listed under Guests / Registration Form). If need be, you can add more guests.
2. To bill outstanding items, select them in the left list. You can select one or more items at the same time.
3. The items will be moved from the left list to the right list (the items to be billed in this invoice), by pressing the arrow to the right button. If there are any deposits listed in this booking, it has to be listed in the final invoice. To delete items from the right list (e.g. because you want to bill them in a different invoice), select them in the right list and then press the arrow to the left button. This will move the items back into the left list.
Important: If a split invoice for a deposit has not been created yet it cannot be put onto the final invoice.
4. Select the payment method. The term of payment, that you have defined for the payment method in the Preferences, will be suggested automatically. You can edit the term of payment. If you do, it only applies to this invoice. The term of payment you have defined in the Preferences will not be affected.
5. You can also set the invoice to paid immediately. If you have a payment method with the payment term “0”, the invoice will be set to paid on its own. You can change the paid on date freely for every payment method except for cash.
In the tab Texts you can find all texts for this invoice.
Here you can change the correspondence language or the texts individually.
Tip:
You can generally change the texts under Administration > Texts to suit your needs.
In the tab Options you can find some more settings for the display of the invoice:
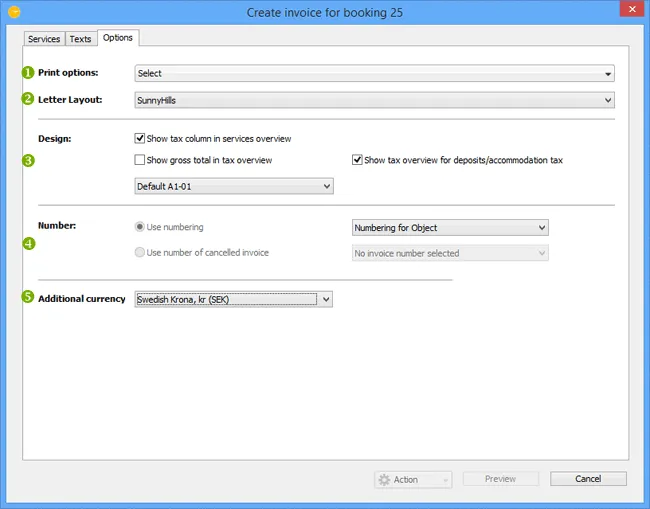
1. Using the Print options dropdown menu, you can make changes to which information is to be printed on the invoice and how items should be grouped together if possible.
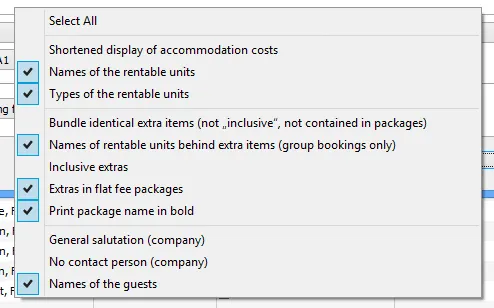
Bundle identical accommodations and bundle identical extra items are options very helpful when generating an invoice for a group booking. Instead of displaying every booked room separately and listing the extra items which have been added to the respective booking separately underneath each room, this options can combine identical rooms to a single invoice item and show the number of booked rooms in the quantity column.
This can shorten invoices for group bookings significantly.
You can furthermore show or hide certain items on the invoice, depending on what you need. For company contacts with a contact person listed, you can also decide, if you want to use the general salutation instead of a personal one and if you want to print out the contact person’s name in the address field.
2. Select a letter layout that you’ve previously designed in the Preferences. By default, Lodgit Desk will select the one you’ve added to this object’s preferences.
3. Lodgit Desk also offers several design options that you can choose from. First, select the filter options you need, then you can select one from the list. Use the Preview window to check the design you want to choose.
Please make sure that all necessary information for your business (especially tax information) is still displayed on the invoice. When in doubt, please contact your tax advisor.
4. You’ll also find an option to select a different numbering set (e.g. because you have different sets for private and business guests). You can also select a number of a previously cancelled invoice; this way you can quickly reissue a cancelled invoice.
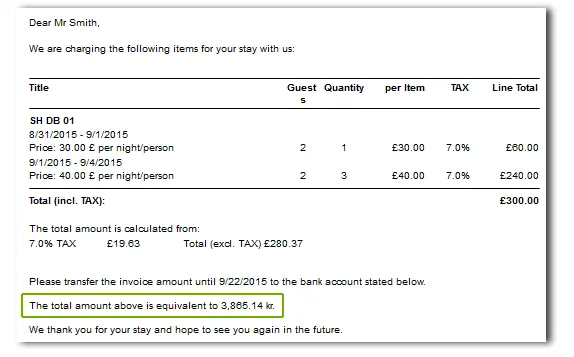
5. Should you have set up alternative currencies in the Preferences, you can select one here. This will display the end total of the invoice in that alternative currency as well, in a sentence underneath the invoice:
Print, send or save invoices
You can preview your invoice by pressing the button Preview. There, you can also print a draft that won’t be saved. In the Actions menu, you can select if you want to Print the invoice, Create a PDF from the invoice or send the invoice as an Email with PDF attachment. If you want to cancel the entire process, press Cancel.
Important:
If you want to send invoices as PDF attachments via email, you must first enter an email address in the guest’s contact information in the Guest Management.
When you print the invoice, the invoice data will be saved. If you don’t want to save the invoice, close the window or cancel the print process.
Send invoice as an email with PDF attachment
If you want to send the invoice as an email attachment, the following window will open:
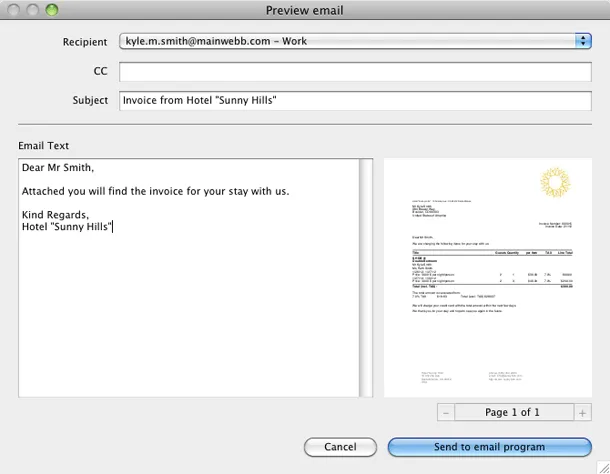
Here you can add more recipients, edit the email text and preview the invoice PDF. Once you’re finished, press the button “Send to email program”.
Note:
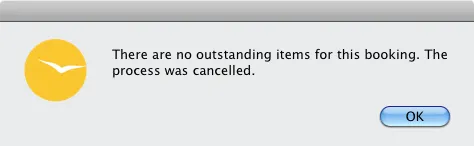
If there aren’t any outstanding items in a booking, the “Create Invoice” process will be cancelled and the following message will pop up:
View invoices and print them once more
There are three ways to view existing invoices and print them once more:
1. Go to Administration > Archives > Invoices to view all invoices that you have previously created with Lodgit Desk. Here, you can print them again (more information: Manage invoices).
2. You can also view the invoice(s) for a particular booking by opening its booking window and going to the Correspondence list item. You can also print the invoice(s) again from here.
3. You can also view all invoices created for a guest by going to their guest history (in the Guest Management). More information on that can be found here.